Add a remote camera in Xeoma
Fixed IP address, VPN, FTP upload and other variants to add your remote camera in Xeoma video surveillance system
Nowadays cameras are installed everywhere, and video surveillance software should be able to work with any camera from anywhere.
Xeoma video surveillance system works with 99% of all camera brands on the market and supports plenty of ways to connect a remote camera.
If you have a remote camera connected somewhere far away from your local Xeoma, you can add it in the video surveillance software using any of the following ways:
Static (fixed) IP address
dynDNS
VPN
FTP upload
HTTP upload
P2P connection
You can connect your remote camera in Xeoma video surveillance system using its static (fixed/public/external) IP address.
A static IP address is simply an address that doesn’t change. Once your device is assigned a static IP address, that number typically stays the same until the device is decommissioned or your network architecture changes. Usually, you can purchase static IP address (e.g. monthly subscription) from your Internet provider.
Note that 192.168.X.X is a local IP address that is not “seen” outside your local network. So it can not be used to add your remote camera directly.
If your remote camera has a static (fixed) IP address, you can add it in Xeoma directly:
1. Launch Xeoma
2. Add your camera via “+” menu – Search by IP/password – specify your camera’s static IP address, login/password and port (optional)
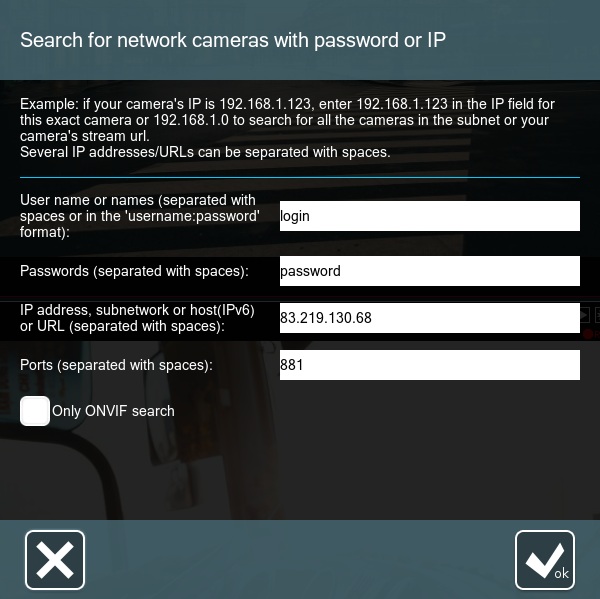
The best way is to use ONVIF-compatible IP camera and specify ONVIF port it Xeoma. This way camera will be found quickly.
Alternatively, you can add your camera manually via “+” menu – Add new camera manually – specify the full URL of MJPEG/JPEG/H264/MPEG-4 stream from your device.
You will need to find the correct URL in camera’s documentation, Internet or ask camera’s manufacturer.
Advantages of this method: quick and easy way to add your remote camera.
Disadvantages of this method: static (fixed) IP address is a paid service.
Another way to add your remote camera directly in Xeoma video surveillance software is to configure dynDNS address, for example, “yourcameraname.dyndns.com”.
Dynamic DNS (DynDNS) allows you to access your devices from the internet via a simple-to-remember domain name.
DynDNS can be configured on a computer that is installed on-site or on a router connected to the camera. In this case your camera should support dynDNS. Usually, ip cameras provide possibility to use dynDNS (most of the time it is a paid service).
You can add your camera in Xeoma using dynDNS address this way:
1. Launch Xeoma
2. Go to “+” menu – Search by IP/password – specify your camera’s dynDNS name, login/password and port
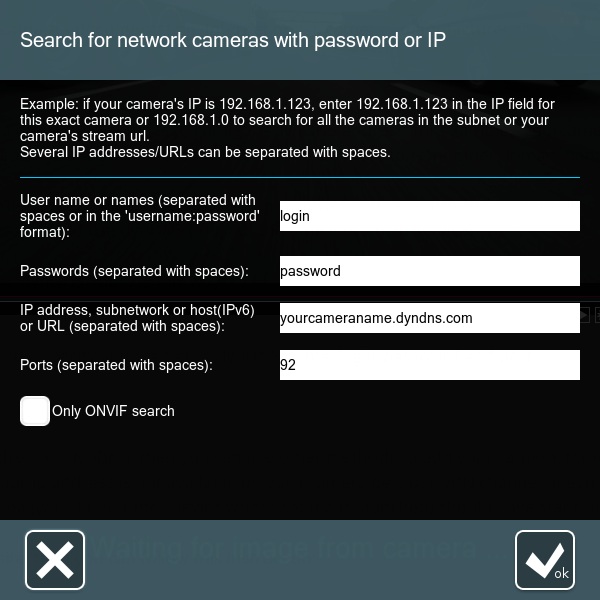
Advantages of this method: simple way to add your remote camera.
Disadvantages of this method: camera should support dynDNS technology. Usually, dynDNS is a paid service. Configuration of dynDNS might require tech-savvy abilities.
If your camera doesn’t have static IP address or dynDNS, then you can use other methods to add your camera, for instance, VPN.
This option is highly recommended if static IP address is not available on each camera because VPN channel doesn’t reduce FPS and video resolution.
But note that your server with local Xeoma (your PC or another device where Xeoma video surveillance software is launched) should have static IP address.
If your remote camera has a router/computer on-site, then you can follow this instruction:
1. Launch Xeoma on your server machine and install VPN Server there. Instruction here.
2. On your camera’s side you need to install VPN Client on router/computer near the camera. Instruction here.
In this case ports to the camera should be forwarded.
3. Add your camera in Xeoma via ‘+’ menu – Search by IP/password
Advantages of this method: no need to purchase static IP address for each remote camera. FPS, resolution and bit rate is not reduced.
Disadvantages of this method: local Xeoma server should have static IP address (paid service). Configuration of VPN might be too difficult. Wi-Fi router should support VPN.
Another variant to add your remote camera in Xeoma video surveillance system is FTP upload.
If your remote camera supports FTP upload of images, then you can follow this instruction:
1. Launch Xeoma on your server
2. Add a new chain (“Add new camera” option in the “+” menu in the lower panel), delete the “Universal camera” module and replace it with a “FTP Receiver” module:

3. Set up the camera and the FTP Receiver module in Xeoma as described in this article.
ATTENTION! If you’d like to use this method, make sure your camera supports FTP upload of pictures. Test compatibility with your camera and other features of the service in the Trial version of Xeoma video surveillance system.
Advantages of this method: no special training or complicated setup is required. No additional equipment required on site (where the camera is).
Disadvantages of this method: camera may be non-compliant with this feature. With FTP Upload you will get only 1 fps framerate of your stream.
This option is available for remote cameras that have a computer (miniPC or any other device that can work as a server) on-site.
Note that local server with Xeoma video surveillance system should have static IP address.
If your camera has a device that can act as a server installed nearby (e.g. a microPC), then you can connect it remotely to your Xeoma Server using HTTP upload this way:
1. Launch Xeoma video surveillance software on your server.
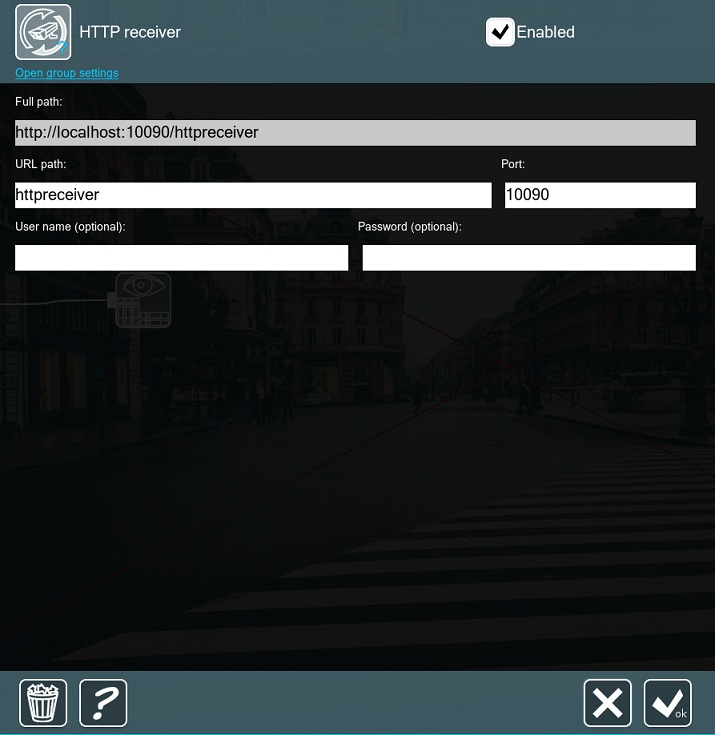
2. Go to the “+” menu – “Add new camera” and replace “Universal camera” with “HTTP Receiver” module:

3. Copy URL (http://localhost:10090/httpreceiver) from the “HTTP Receiver” module’s settings and replace “localhost” with static IP address of your server:

4. Next launch Xeoma e.g. in Free mode on a device (a PC, microPC etc.) that is installed near your remote camera and add the following modules chain there:
Add your camera via ‘+’ menu and connect “HTTP Upload” module.
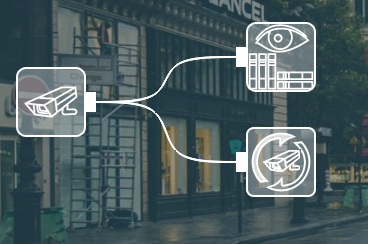
5. Go to the “HTTP Upload” module’s settings and specify URL from “HTTP Receiver” module with static IP address there:
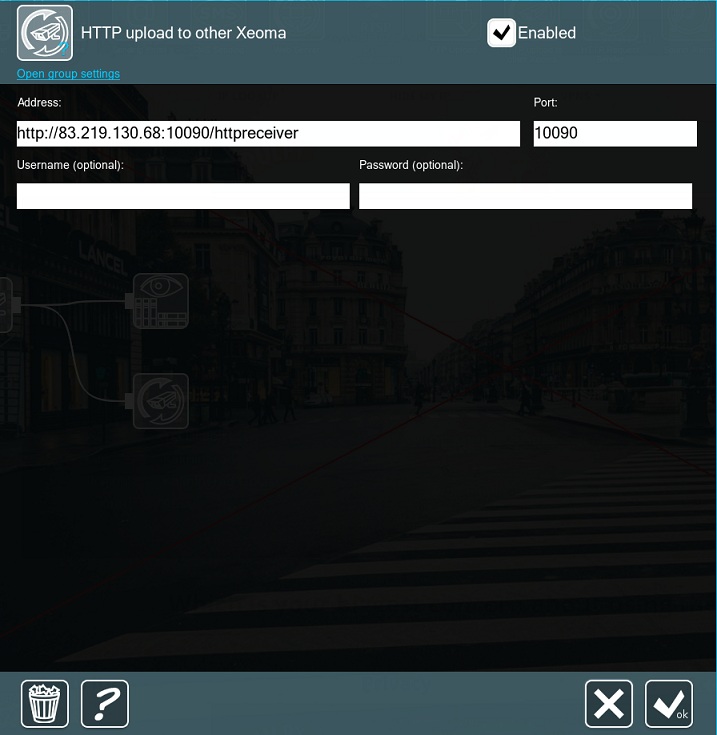
6. Wait for some time, and then you’ll see video from your camera in your Xeoma Server
Advantages of this method: quick and easy configuration.
Disadvantages of this method: local Xeoma server should have static IP address (paid service). Extra equipment required (server near the camera).
You can connect P2P cameras using their P2P ID (Cloud ID) by means of downloading Xeoma on a computer with Windows OS 32-bit (starting from Xeoma 18.2.2). You can connect only P2P cameras that work through the AEeye server.
In order to add a P2P camera in Xeoma, you’ll need to download Xeoma on your PC with Windows 32-bit and launch it.
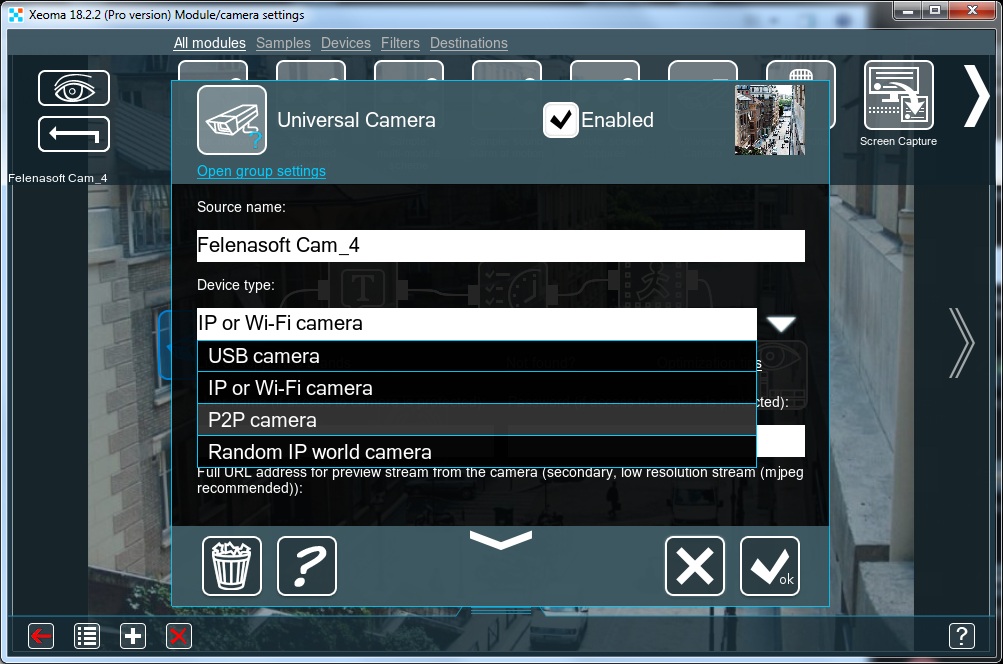
Go to the “+” menu – Add new camera manually – and select “P2P Camera” in the “Device Type” drop-down menu:
After that please specify the camera P2P (Cloud) ID, as well as login and password for the P2P connection:
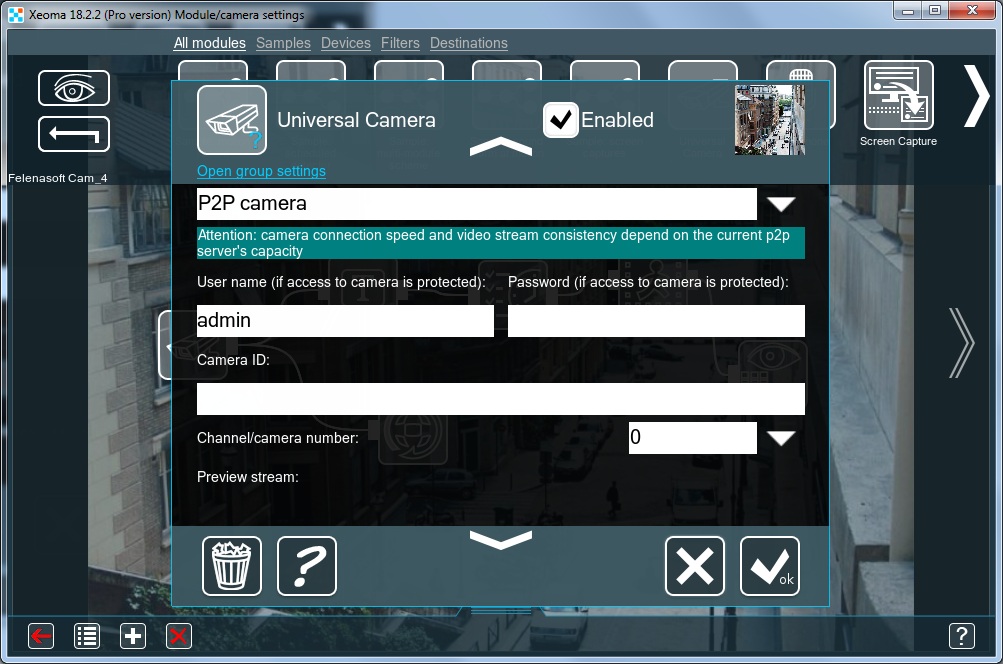
Next, select the streams for the Main window and for recording to the archive.
Please note: the stability and quality of the video stream is directly dependent on the workload of the P2P server through which the camera is operating. Unfortunately, Xeoma can not influence that.
Advantages of this method: quick and easy configuration.
Disadvantages of this method: supported only P2P cameras that use Aeye cloud server. Works only on Windows OS 32-bit. There may be poor stream quality, unstable operation, or the camera will completely stop responding due to the connection via 3rd party cloud server.
As you can see, there are multiple ways to add your remote camera in Xeoma video surveillance system. If you have questions left, please feel free to contact us, we’ll gladly help!
September, 14 2021
Read also:
How to use FTP upload in Xeoma?
Using the Web Server