Create a simple home surveillance setup with what you have on hand
Moving from an apartment in the city with only two inputs and outputs, and no access from the street through the windows, to moving into a suburban house where everything is suddenly easily accessible makes you consider your options when it comes to alarm and surveillance systems.
A subscription-based alarm system can be expensive in the long run, especially if camera monitoring is something you’ll have to pay for, so making your own monitoring system either as a standalone solution or in combination with another alarm system is an interesting possibility. It doesn’t have to be expensive, and there is a good chance that you already have many or all the parts needed to make a very flexible surveillance system.
In a house with five doors divided into four inputs (where two of the doors are facing each other), a simple setup can consist of the following:

- An older laptop with HDMI termination – so it can run 24/7 in closed mode
- A relatively old Android phone (in this case a Samsung Galaxy s4 mini)
- A USB camera
- An IP camera (cheap surveillance camera)
- A Raspberry Pi board
- Raspberry Pi camera
- A Xeoma Lite licensed for four cameras
The older laptop will serve as a focal point for the four camera inputs, and that’s where the Xeoma Lite is installed. Of course, a desktop can be used, but since we have an old laptop with a broken screen it was only natural to use this and let it run as a headless server. A VNC server is installed at the same time, so you can always use your normal computer to browse through archives or just use the set-up to keep an eye on your kids, even when they are playing somewhere else in the house.
The laptops are hidden at the back of the house and connected to a USB camera. The solution is not perfect, but because it is at the back of the house, the set up doesn’t matter too much.
A Raspberry Pi camera is connected to a surplus Raspberry Pi. This will have the required software (motionEye) installed and is set to run as a web server. The camera has a high resolution and is used to look beyond the living room and because there are large windows, it will also register if someone walks in the garden near the house.
The dedicated surveillance camera is set at the main entrance. This is the area where most people move around. The good thing about this camera is that, while it’s cheap, it has both IR LEDs and a night mode, where you can easily see what’s going on in the dark throughout the hall. It comes with its very own, hopelessly bad, web interface, but it can perfectly send an rtsp feed to Xeoma Lite.
The last camera is an older Android phone where the screen is broken – but the camera is not. It’s perfect for running a highly soluble feed for Xeoma Lite. On the phone, IP Webcam pro is installed and ready to send directly from the main door. The phone itself, however, is plugged into a permanent charger. It quickly depletes the battery to make the phone function as a web server.
The router is notified which IP addresses are reserved, and Xeoma Lite is now ready to be set up to receive.
Getting the Xeoma Lite up is very easy.
The first camera is running directly from the machine itself – so you just have to put it on the USB camera and you’ll see the preview right away.
All the cameras that act as ip cameras are set up the same way in Xeoma Lite.
All four cameras have the same modules. We only need a simple setup, which is why the choice has fallen on the Lite edition rather than one of the more advanced editions.
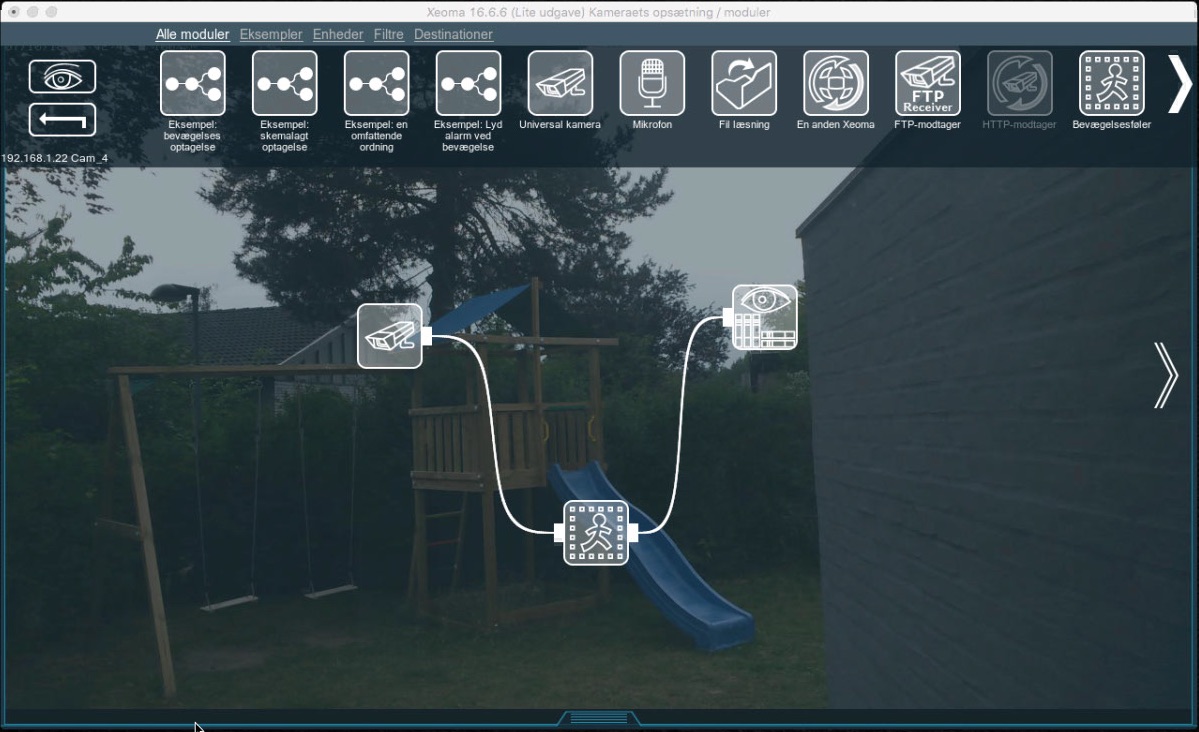
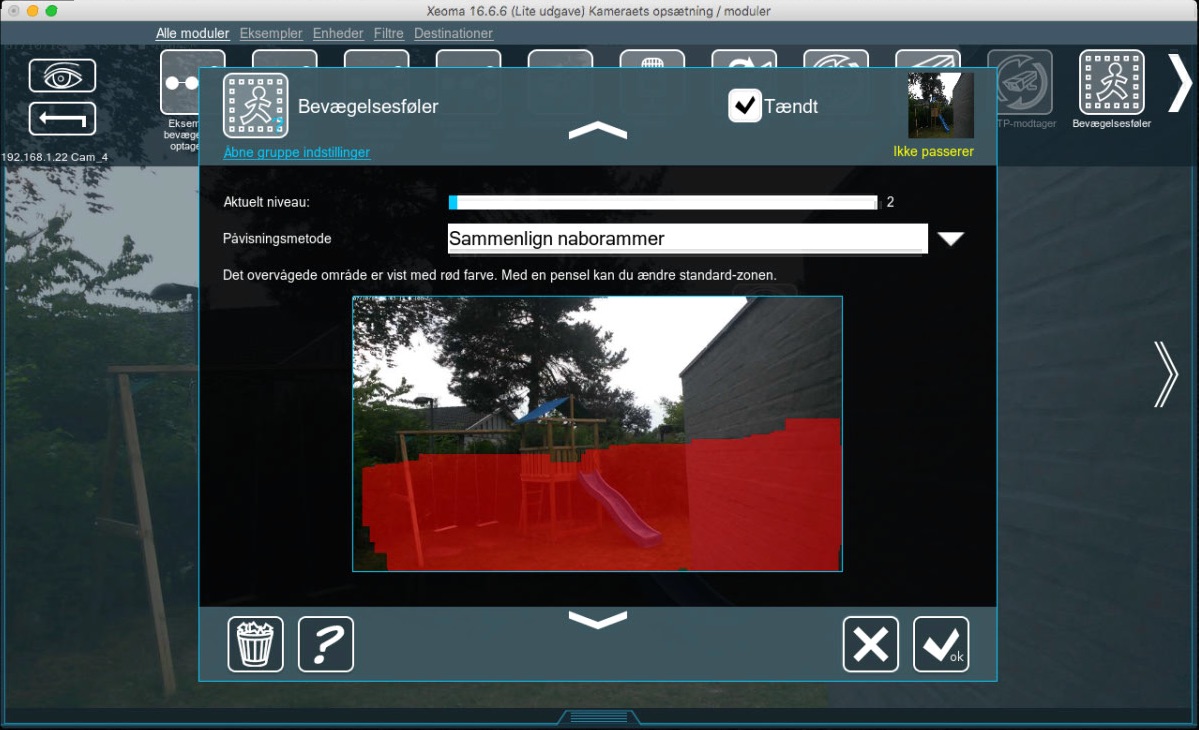
We need it to be recorded with motion detection and stored in an archive.
And when this is set up we have a very cheap, but very flexible, surveillance system.
July, 13 2018
Read also:
DIY home security system
Choosing the right Android devices for live CCTV
New Raspberry Pi 4 board: new system for video surveillance