DIY video surveillance system

Creating video surveillance system might be a tough call because there are so many cameras on the market and too much information around this topic.
In this article we will try to highlight all basic points, so you could easily create your own video surveillance system from scratch. Let’s start this DIY video surveillance system project.
First off, let’s point out main characteristics of the DIY video surveillance system that we would like to have. Let’s say it’ll be a home CCTV system with 4 IP cameras (2 inside and 2 outside) and mobile surveillance app to review the cameras remotely from a smartphone.
Choosing cameras
The main advantage of a DIY surveillance system is that it is usually assembled from components you have at hand or can cheaply purchase. Luckily, nowadays, you can use any cameras you like for such a system – even simple USB web cameras or analog cameras connected through a DVR.
But we recommend using IP cameras since this kind of equipment is the most technologically advanced and flexible in its settings. Price range depends on the brand and model that you choose.
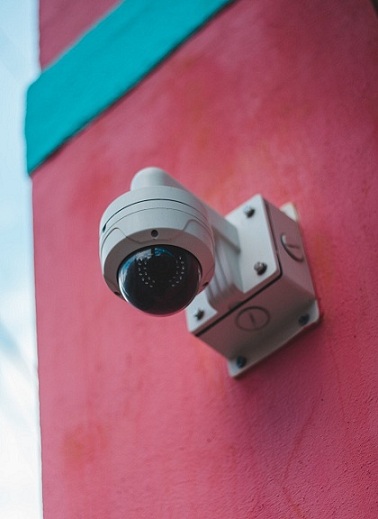
 For the outside view we recommend using network cameras with the “Outdoor use” tag in their specs – such cameras are specifically manufactured to work in the widest temperature range and resist humidity, dust and other poor weather conditions. Most popular for the outdoor use are bullet or dome types of cameras, the latter are often equipped with motorized PTZ (pan-tilt-zoom) capabilities, so you can monitor the whole area or configure PTZ touring. Another great characteristics is IR light that could be useful for the nighttime.
 For the inside part of the house you can choose any suitable IP camera, for example, bullet camera with 2 – 4 MP resolution. Usually, it’s enough to capture necessary moments or faces. There are wide angle cameras available on the market as well, so you can choose this kind of cameras if you need to cover the whole room.
These camera parameters should be suitable for the small DIY video surveillance system.
Xeoma supports 99% of all camera brands on the market.
Some of our users prefer popular brands such as HikVision, HiWatch, Dahua, D-link, Axis etc., so they should be working fine.
You can check list of supported cameras here. It’s a work in progress, we often add new models.
You can also contact camera’s manufacturer and check information about testing the chosen camera model in Xeoma for the DIY video surveillance system.
Choosing other equipment
Now that you’ve selected cameras that most fit your needs and planned purposes, we can think of what processing unit will gather information from cameras, process the image with video analytics and do reactions. Some cameras have embedded admin pages with this or that functionality but to gather them all in one place, you’d most probably need a machine.
Your choice of a machine for that purpose depends on the software that you will be using. Luckily, with Xeoma, a PC, or a laptop, or even a tablet can be used – just a simple home device with no need for a hardcore professional server.
Xeoma supports all popular operating systems, so you can choose an OS according to your preferences.
List of supported OSes can be checked here.
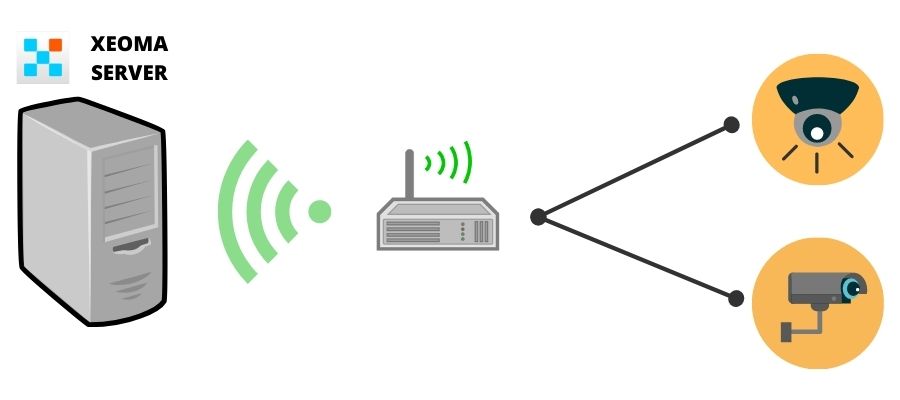
You’ll also need to purchase a router and a cable piece to connect your cameras to the router. The connection between a computer, router and cameras can be wi-fi for simplicity, or wired for more stable work.
All done? Great, you’re one step closer to your DIY video surveillance system!
Assembling your DIY video surveillance system
After all components are prepared, we can carry on with this DIY video surveillance system project by putting them all together.
Mount your cameras outside and inside the building. Connect and set up your router.
Trench cable from cameras to the Wi-Fi router. This way your cameras will be connected to the router, and when router is connected to the server (a PC), your cameras will be “seen” in the local network.
Now, when the cameras are connected to a network, each camera will have its own IP address assigned by default (it can be checked on the camera’s box or in its documentation).
So after a camera is connected to the router you can open a web browser on a PC connected to this router and visit the camera’s administrator page by typing something like this in the address bar: http://CAMERA’S IP ADDRESS:PORT (e.g. http://192.168.0.10:80)
Default ports usually are 80 (http) and 554 (rtsp). In the admin page of a camera you can change the IP address, login/password and ports as well as adjust other settings.

Downloading Xeoma apps
Of course, you can review your cameras via their administrator pages in browser. But don’t you want more? In Xeoma you’ll find various video analytics from basic to the advanced ones, as well as you can review your cameras together in one application. Xeoma has a wide range of functions and features that you can use for your DIY video surveillance system: motion detector, object recognizer to detect animals, cars, people etc., SMS and email notification (+ PUSH-notifications), PTZ tracking and touring with presets, sound alarms, face recognition, license plates recognition to detect particular license plates from a white list and automatically open gates, and many other things.
So let’s get going with your DIY video surveillance system and download Xeoma for your OS here.
Launch Xeoma on your server (a PC or another device) and your cameras will be found automatically. You can also add your cameras via “+” menu in the bottom panel. You can use e.g. “+” – Simple search for local cameras or “+” – Search by IP/password.
Configure necessary modules and their settings (click on the module in your module’s chain to open its settings). Full Xeoma manual can be checked here.
Xeoma versions are available for any budget and requirements. Starter and Lite licenses are suitable for small installations, Standard and Pro for the systems with more of advanced requirements. Also, Xeoma allows using AI-based modules. Prices for all Xeoma licenses can be checked here.

|
Read also: Best video surveillance system 2021 |
Remote view from mobile devices
Now your DIY video surveillance system is fully configured and ready.
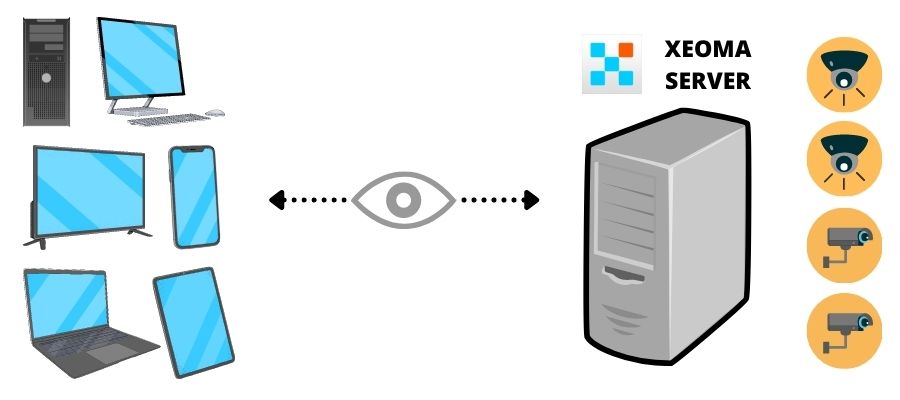
You can review your cameras in a local network or connect remotely from any place using any device e.g. a smartphone, tablet, your work office’s laptop, another PC etc.
In order to connect to your Xeoma Server remotely, it should have “fixed” IP address (address that is “seen” from the Internet). There are multiple ways in Xeoma to connect to your Server outside your local network.

If you’d like to review your camera remotely, you can do the following:
1. Take advantage of P2P – our WOW opportunity. Briefly, it’s a revolutionary free-of-charge method to connect from a remote client part to a server part of Xeoma within different networks. It’s the new free alternative to having a public IP address on the server machine. Here you’ll find a step-by-step guide about setting this connection up.
Please, keep in mind that the P2P connection is available in Xeoma starting from version 22.11.25. Works for all supported operating systems and in all editions except for the Free edition. Operates for multi-client and/or multi-server connections as well.

|
Sometimes the P2P connection doesn’t work due to the network infrastructure limitations. So this issue might be connected with your network provider that blocks STUN-server connection attempts. In this case, you can use our other remote connection options described below. |
2. Purchase static IP address for your Wi-Fi router from your Internet provider. Usually, it’s a monthly subscription. Forward ports from your router to your Xeoma local server (8090 – Xeoma’s port and 10090 – web server’s port).
This way you’ll be able to connect to your Xeoma server using Xeoma app on your mobile device – specify your server’s static IP address and password. Password in Xeoma can be checked via Main menu – Remote access – Connect to
Also, if your server has a static IP address, you can connect and review your cameras remotely using a “Web server” module. More about this module and review your cameras via browser here.
3. Use a static IP address analog in Xeoma called Repeater. Repeater is a service similar to but more powerful than dynamic DNS. It gives you an opportunity to access your computer with Xeoma program even if it is not available from Internet, i.e. inside firewall, at private IP address space, at mobile network, or in some Asian countries where no real IP addresses are available. More here.
You can purchase Repeater subscription and connect to your Xeoma Server from anywhere.
After you choose necessary variant whether it is a static IP address or Repeater, you can download Xeoma app for your iOS or Android device (Client only) and connect to your Xeoma server.
Xeoma app for iOS can be downloaded in AppStore, and Xeoma app for Android can be downloaded in Play Store (also known as Google Play or Android Market).
You can also review your cameras remotely from a PC or laptop in a remote location.
You can download Xeoma app here, go to Main menu – Remote access – Connect to – specify your Xeoma Server’s IP address and password (or Repeater credentials) – and review your cameras from anywhere.
Here you have your own DIY video surveillance system created reasonably and affordably. Powerful video surveillance software Xeoma will help you to protect your home and your beloved ones immediately notifying you if something bad or unexpected happens when you’re away. Adjust Xeoma modules to your precise requirements and enjoy your perfect video surveillance with Xeoma!
23 September, 2021; updated 1 September, 2023
Read also:
Let’s get it started, or how to use Xeoma
Xeoma Starter
Xeoma Lite