HTTP upload to other Xeoma

One of the most important features of modern video surveillance is flexibility. The user should be able to “bend” the software so that it fulfills exactly the kind of role needed under the circumstances. To this end, every remote software worth its mettle strives to give the user options aimed at solving an increasingly large number of problems. Consider this example:
- we have a computer with a USB-camera with a built-in microphone
- we need access to both video and audio from this camera on another computer
- the archive needs to be stored on the second machine (audio included)
A USB-camera means no usable IP address, which complicates the idea of allowing the software remote archive storage. While the situation is not particularly sophisticated, most products on the video surveillance software market are unable to provide a decent solution for it. Xeoma, however, has an answer for that as well. A combination of “HTTP upload to other Xeoma” and “HTTP Receiver” modules does exactly that.
The “HTTP upload to other Xeoma” module’s functions are simple: send the image received over the chain of modules to the module “HTTP Receiver” wherever it is over http protocol. The modules work in tandem, so their settings are mutually connected:
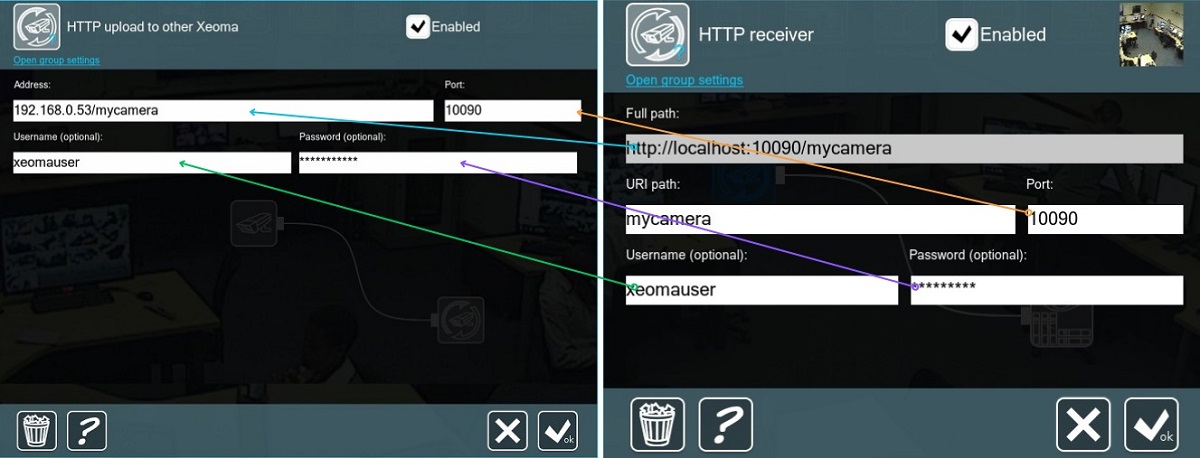
Here’s how they are to be configured:
Step 1. It’s recommended to start with adding the “HTTP Receiver” module in Xeoma on the receiving side, since it generates most of the settings to be used.
Once you add “HTTP Receiver” to the chain in computer that will be receiving the stream, and open the module’s settings, the first thing you will see is an non-editable field “Full path” the contents of which are comprised by Xeoma out of the word “localhost”, a port and the unique module name that you can put in the “URI path” below to differ between several such modules.
The Port can be anything that is currently not occupied by some other process. By default it’s 10090.
The full path might look like http://localhost:10090/myreceiver or http://localhost:10090/officecamera in result.
Since a “localhost” address only works when used on the same machine – which is not what we need in our example – we need to replace the word with the computer’s ‘home’ network address. To do that, copy the Full Path contents to a Notepad or other text editor and replace “localhost” with this machine’s private IP address to get something like http://192.168.0.54/myreceiver or http://192.168.1.12/officecamera in result.
Username and Password can be set to make sure that no one else can view that stream. However, it won’t be possible without using Xeoma and knowing both the IP and the module’s unique name, so those are optional.
After “HTTP Receiver” is set, copy the resulting path and credentials (if used), and go over to Step 2, which is to be done on the sending side.
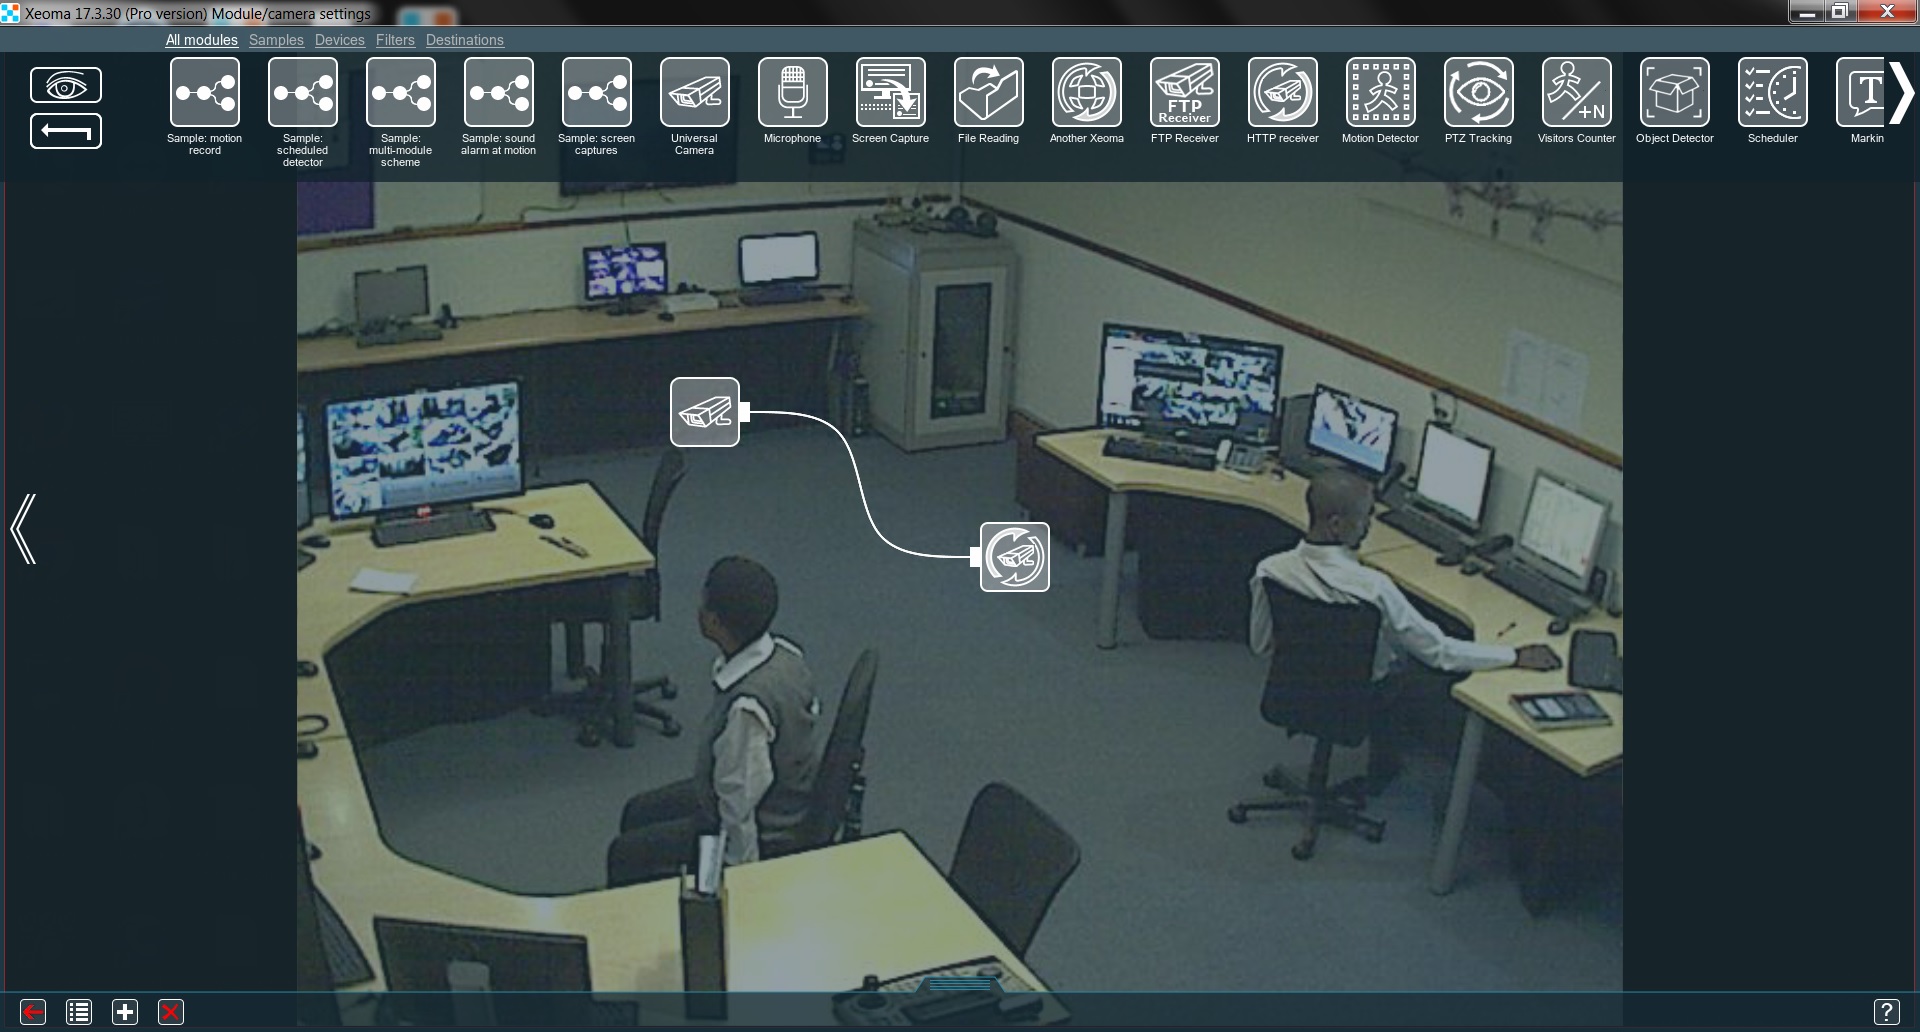
Step 2. While in computer that will be sending the stream (in our case, the machine with the USB camera), end the modules chain for this cam with the “HTTP upload to other Xeoma” module.
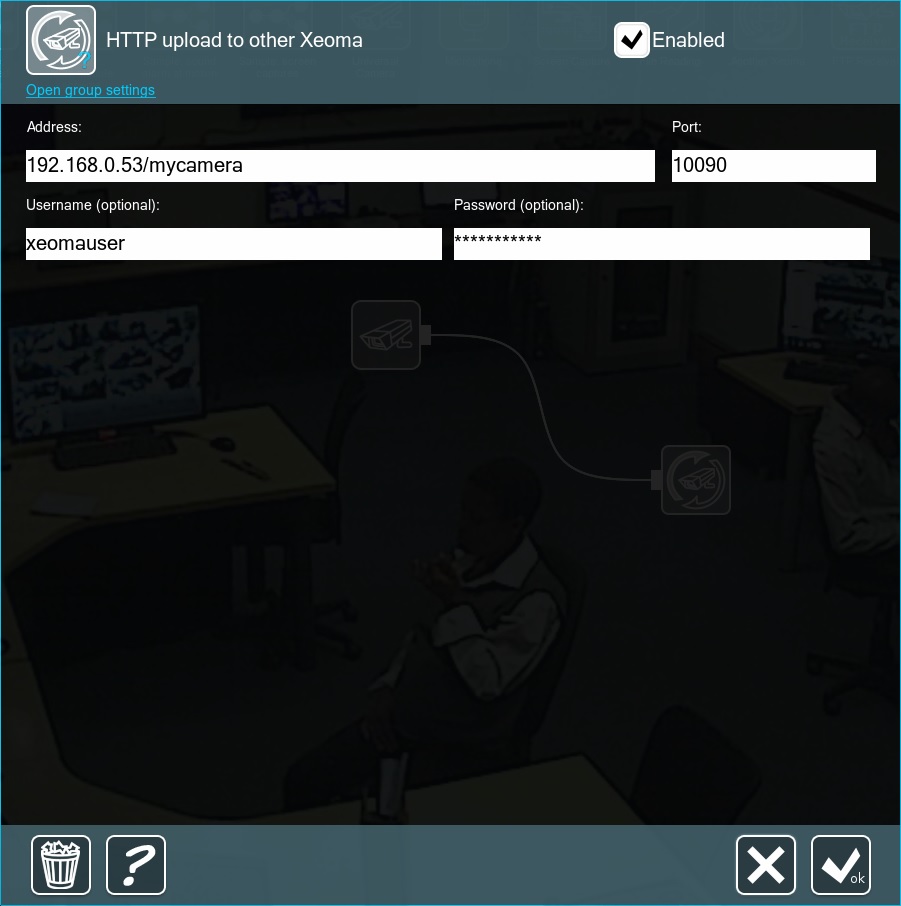
Its settings will basically reflect the “HTTP Receiver” settings:
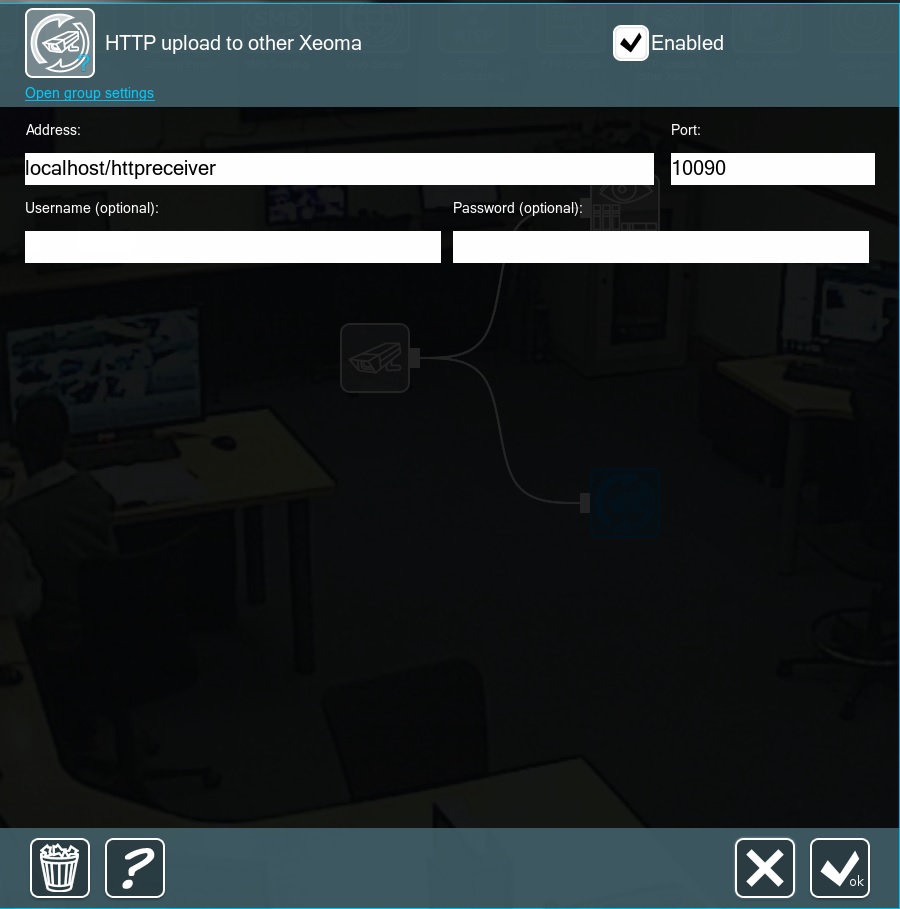
Insert the full path that you got in “HTTP Receiver” after replacing “localhost” with the receiving machine’s private IP address (http://192.168.0.53/mycamera in our example) into the Address field. Insert a new port in the ‘Port’ field if you used another port instead 10090 in Step 1. The same goes for credentials: if you set a login and password in Step 1, repeat them here too.
What makes this particular pair of modules stand out is the ability to relay more than just the image – the sound is transferred as well. “HTTP upload to other Xeoma” looks for the machine with the designated IP, checks if it has the with the same unique name (and username/password if any) and sends the stream to it. This creates a secure transmission of both video and audio between 2 machines.
Among others, it is used in Xeoma’s new version (17.3.30) to enable the 1-click Cloud mode: modules “HTTP upload to other Xeoma” connect to all your local cameras while Xeoma Cloud creates “HTTP Receivers” with all the necessary information already inside.
 |
It is possible to transfer streams from one Xeoma’s server to another using other methods. One of them is FTP. Connect “FTP Upload” to the camera and create a chain with “FTP Receiver” on the second machine. This won’t work as a solution for this situation, however, as the result will be only the visuals, no audio. FTP is capable of transferring sound only when the stream’s format is H.264, which is native to IP cameras only.
Another option is transfer through the web. Connect the “Web Server” to the camera, while using “Another Xeoma” on the second machine. This won’t fit our specific needs either for the same reason – plenty of video, no audio. |
However, these examples work only within the same local network. And what if the two computers are in different blocks or even cities? In that case, the first computer requires an external static IP address. If you go with the first option, you need to put the second computer’s public IP address or its substitute in “HTTP upload to other Xeoma”.
Another part of our example was secrecy: Xeoma’s work on the main computer should be hidden from the operator. This is easily accomplished by Xeoma’s Hidden mode – one of the installation modes. It will keep Xeoma working on that machine in foreground without alerting the operator while still sending video and audio from the camera on the other computer. The principles of remote software are followed fully.
To sum up, the solution looks like this:
- Launch Xeoma on the first computer – the one that will be receiving the camera stream – and make a chain with the “HTTP Receiver”.
- Access its settings and indicate the unique name and username/password. Then copy the resulting line from the ‘Full path’ field and replace “localhost” with this machine’s external static (“public”) IP address.
- This concludes the work on that computer, we can close Xeoma’s window here. Now launch Xeoma on the second computer – the one that will be sending the camera stream – and add “HTTP upload to other Xeoma” to the chain for the USB-camera.
- Access its settings and indicate the first computer’s ‘full path’ along with the name for the module and username/password if necessary.
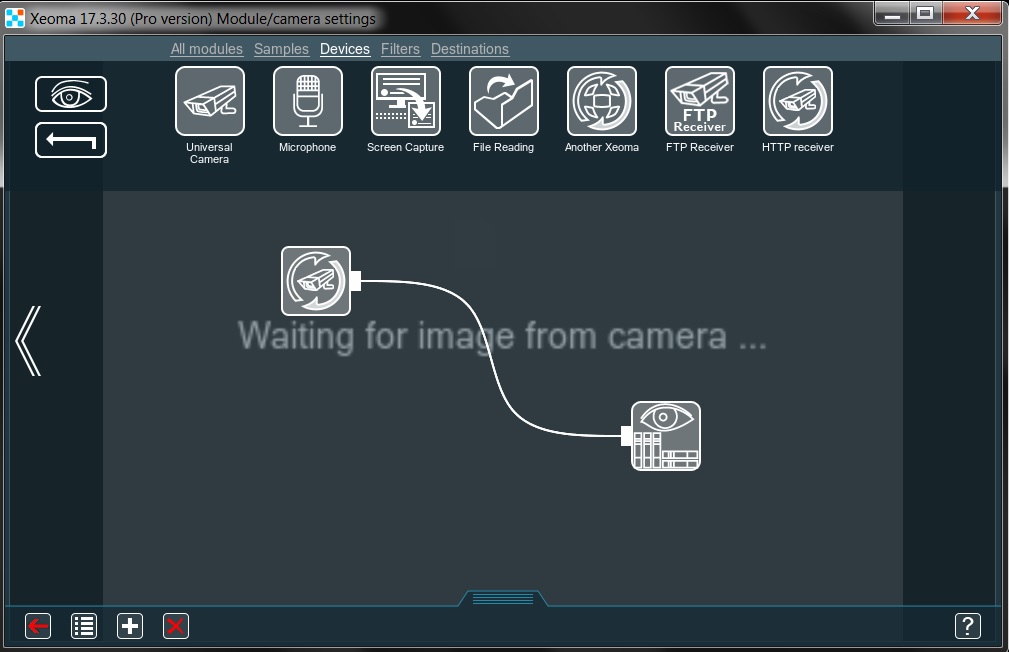
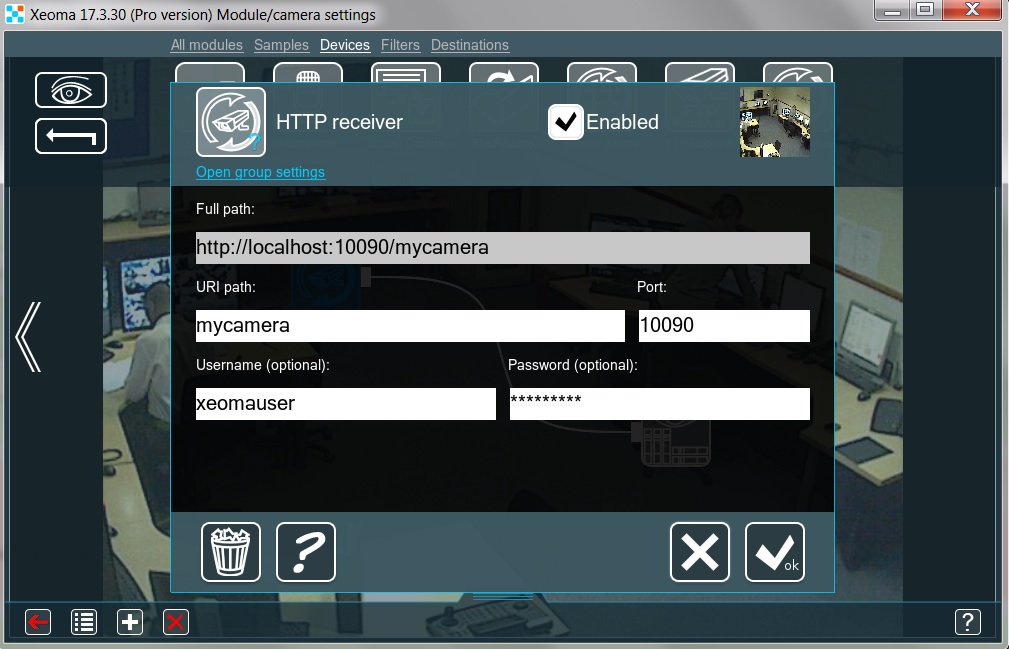
All done! Now our remote software allows this computer to view the USB-camera live or its archive at any time.
![]() Starting with Xeoma 23.6.14 P2P connection is available for use in “HTTP upload to other Xeoma” and “HTTP Receiver” as a free-of-charge alternative to having a public IP address. It is free and safe, and makes connection easy. Read more about Xeoma’s P2P connection
Starting with Xeoma 23.6.14 P2P connection is available for use in “HTTP upload to other Xeoma” and “HTTP Receiver” as a free-of-charge alternative to having a public IP address. It is free and safe, and makes connection easy. Read more about Xeoma’s P2P connection
The same configuration guide will be somewhat different when P2P connection is used:
1. First step would be enabling P2P connection on the receiving machine – the one with HTTP Receiver module. To turn it on, go to Xeoma’s Main menu — Remote Access — P2P connection configuration. You will see more information about this free service in the newly opened “P2P connection configuration” window, followed by the tickbox for enabling P2P connection and getting a unique address for the server.
Tick the “Enable the P2P connection option” and wait a couple of seconds. The “P2P address of this server” will have the unique address in the format “AAA-BBB-CCC”, an alternative to a public IP address. Copy the address.
2. Next, you can follow the general guide mentioned above – but use the just copied P2P address instead of an IP address. So when you copy the ‘Full path’ from the ‘HTTP Receiver’ and edit it to paste into “HTTP upload to other Xeoma” it will look like ABC-abc-AbC/mycamera. The rest recommendations from the guide stays the same. For example, you can use credentials for enhanced security.
May, 2 2017; updated June 5, 2023
Read also:
How to use FTP upload in Xeoma?
Using the Web Server