Alarms and other technical security equipment in tandem with Xeoma

Video surveillance is often important, but not the only part of a security system, be it a country house, a garage or a full-fledged facility. To get a good view, cameras have to be positioned in plain view, for example at the corners of buildings or poles. This makes cameras potentially vulnerable to intruders – when the elements of the security system are visible to the naked eye, it is easier to devise ways to bypass it. This is where technical security equipment comes into play: sensors, alarms, barriers, detection equipment serving the perimeter, etc. Many of them are much less obvious, while being highly accurate and resistant to both false positives and weather conditions.
A forward-looking head of security (even one who is his own boss, protecting his country house) will want to collect both cameras and sensors into a single system – this makes it easier to work with them, and the overall efficiency of the system will increase, because different devices can cover each other’s weaknesses. Then he will have a question: how can this be realized if all these devices work in different ways? Our answer to this question:
![]() Starting from version 19.2.11 Xeoma has the SmartHome -RIF + module. It works in conjunction with the “RIF Plus” software produced by the START-7 company, which collects information from a variety of security devices. The new module receives this data, displays it in the settings and is triggered by fixing a certain state of the device.
Starting from version 19.2.11 Xeoma has the SmartHome -RIF + module. It works in conjunction with the “RIF Plus” software produced by the START-7 company, which collects information from a variety of security devices. The new module receives this data, displays it in the settings and is triggered by fixing a certain state of the device.
Initially, the module’s settings look like this:

First, you need to specify the local address of the server where RIF Plus is running, and the port through which the software transmits the data. To do this, in the RIF Plus settings, you need to enable integration with external software and set any free port. This can be the same machine where Xeoma is installed – then localhost can be specified as the address. As a result, we get more detailed settings. The first field is a list of devices that are connected to the system. There are many examples of such devices:
- TC – telecommunication cabinet
- Monolith – remote controlled locking device (electronic lock)
- Garda-BR – barriers
- Garda-RBT – razor blade wire
- RIF-RDD – radioray detection device
- Spark – an electrocontact detection device (do not confuse with a Bang, an electroshock security device)
Device ID shows its unique number in the system (it is also shown before the device name in the list).
Description of the device displays the information specified for the device via RIF Plus. There can be both a short description and comments, instructions, etc.
State ID is a number identification of the current state of the device.
The state name is a verbal description of the current state of the device.
The states can be as follows:
0 – Undefined (most likely, the device is connected incorrectly);
1 – Norm;
10 – No connection (can be both network problems, or outside interference – cause for alarm);
100 – off;
101 – Enabled;
110 – Opened;
111 – Closed;
20 – Alarm (triggering);
21 – Alarm (disclosure).
This list can also be viewed in the interface by clicking on the question mark to the right of the input field.
For many devices, only a few of these conditions are relevant. For example, the Monolith locking device can be opened or closed, and the RIF-RDD alarm can have the Normal status – there are no changes in the controlled area; or Alarm (triggering) – the electromagnetic field is violated, someone has entered the zone.
In the next field you need to list the numbers of those states to which the SmartHome RIF+ module should respond.
The slider Interval for checking the device status (in seconds) sets the frequency of requests regarding the state of the monitored device in SmartHome RIF Plus module.
By checking the Switch to this camera checkbox, we will get an instant switch to this camera if the SmartHome RIF+ module was triggered.
Let’s consider examples of using this module:
Example #1
We have a PTZ camera that patrols the perimeter of a certain area, and a TC (telecommunication cabinet), an unauthorized opening of which must be recorded. Let’s make the following chain:
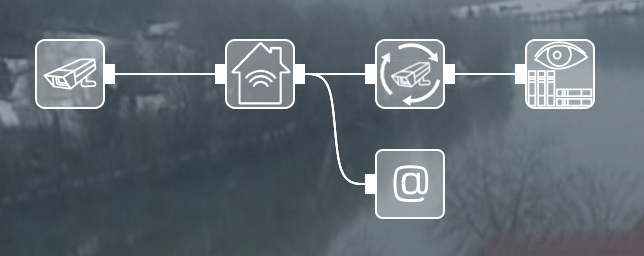
While the SmartHome RIF+ module receives state 1 (Normal) from the TC, the camera is making a tour.
When the state of the TC changes to 21 (Alarm-disclosure) – the camera stops patrolling and turns (PTZ-movement) to the TC (a preset must be assigned to it), recording all events in the archive. The operator gets a picture from this camera on the screen. At the same time, an alarm message is sent by email to the administrator or security chief.
Example #2
We have a facility with a PTZ camera and three detectors:
- Spark
- Monolith
- RIF-RDD
The Spark is monitoring the perimeter around the clock, and the Monolith and RIF-RDD are monitoring the entrances/exits only at night. Let’s make the following modules’ chain:

The upper SmartHome RIF+ module is connected to the Spark and is set to trigger when it receives the state 20 (Alarm-triggered). When the discharge lines are closed or broken, this state is assigned to it. Sending HTTP commands immediately sends a request to the common database, recording the time of the incident. At the same time, the PTZ camera turns to the specified preset and starts tracking the offender.
The medium SmartHome RIF+ module turns on only at night (according to the Scheduler module before it) and is connected to the Monolith. When it receives the state 110 (Open) from it, the detector sends a message to the administrator and operators that someone has used the entry/exit.
The lower SmartHome RIF+ module also works only at night and is connected to RIF-RDD. When the detector receives state 20 (Alarm-Triggered) from it, a sound alarm is triggered for operators.
Please note that the SmartHome RIF+ is not included in classic Xeoma editions (Lite, Standard, Pro) and is licensed separately. Similar additional modules are marked with a yellow VIP sign in this list.
Try Xeoma for free! Fill in the fields below and you will get an email with a demo license for the Xeoma Pro edition and all Additional modules, including the ‘SmartHome RIF+’ module!
To do that, enter your name and your email to send the license to in the fields below, and click the ‘Get Xeoma free demo licenses to email’ button.
November 7, 2020
Read also:
The HTTP Request Sender module in Xeoma IP security cameras software
Panic Button and Video Surveillance Software Xeoma